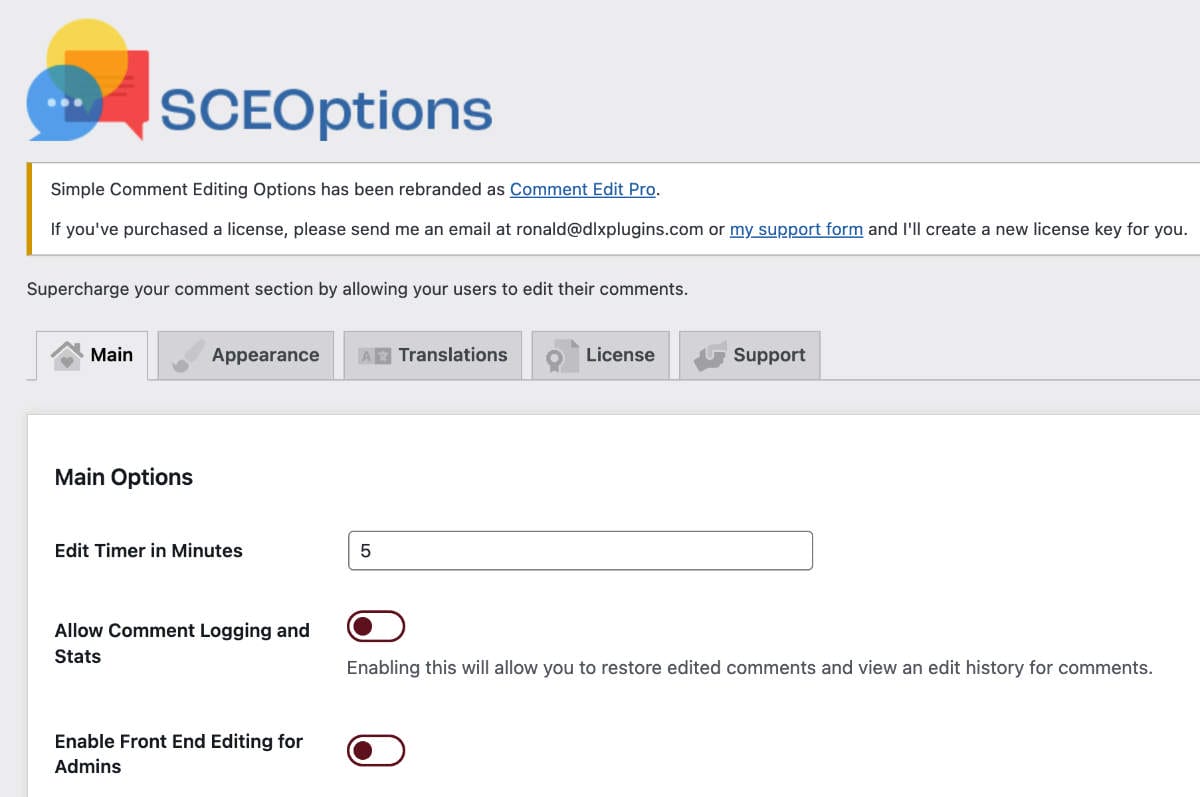
I recently rebranded Simple Comment Editing Options (SCE Options) to a much shorter name: Comment Edit Pro.
The rational was that I planned on adding some features to the add-on that would go beyond options. I still wanted to keep comment editing as the core feature, but had some plans for adding in some much-needed comment tools.
Comment Edit Pro Rebranding
With the rebrand, I wanted to make sure SCE Options license holders can move over to Comment Edit Pro without any headaches.
However, the rebranding confused users. What was this Comment Edit Pro, and furthermore, what was DLX Plugins?
I decided to release an update to SCE Options with a notice that you can migrate to the new re-branded plugin for free.
Once moving Comment Edit Pro over to DLX Plugins, I began working on docs for the plugin.
With the docs and landing page set, I began working on other projects. However, Comment Edit Pro needed some more love. So I brainstormed what I could add to the plugin that would provide the most value.
Admin Rebranding
The old panel was decent as far as design. I tried my best to group the related options in their own tabs.
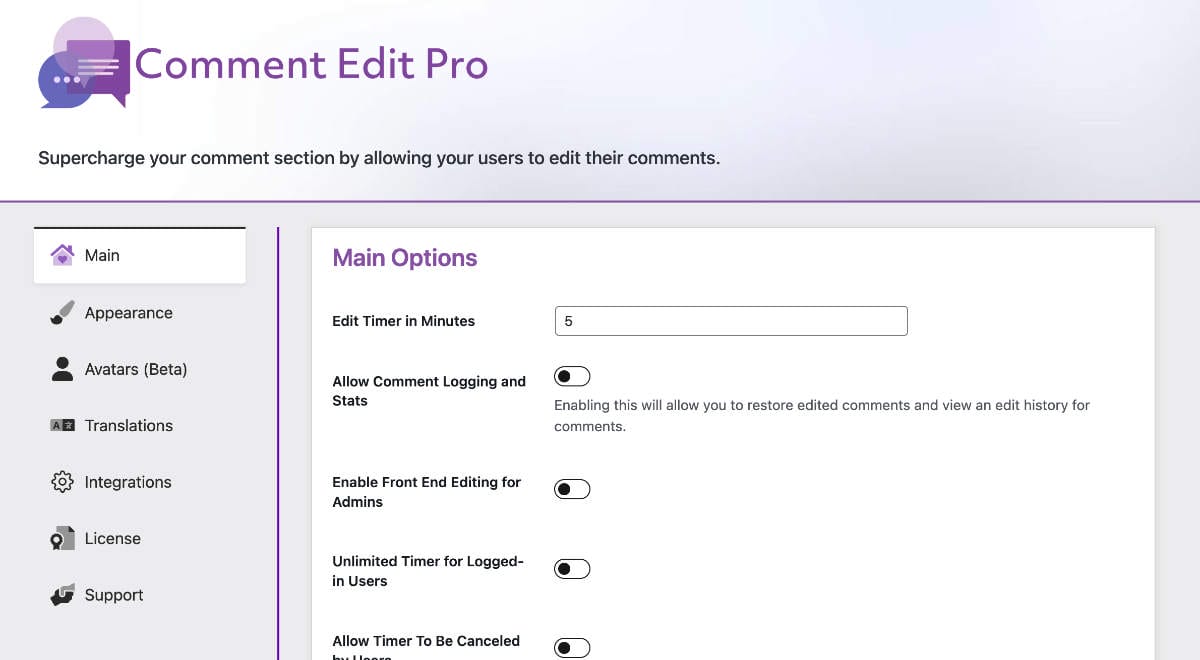
With the rebranding and planned features, the default WordPress admin tabs had to be reworked to be more responsive.
With DLX Plugins and my latest plugin QuotesDLX being purple-themed, I decided to match the color scheme for Comment Edit Pro.
Here’s how it came out:
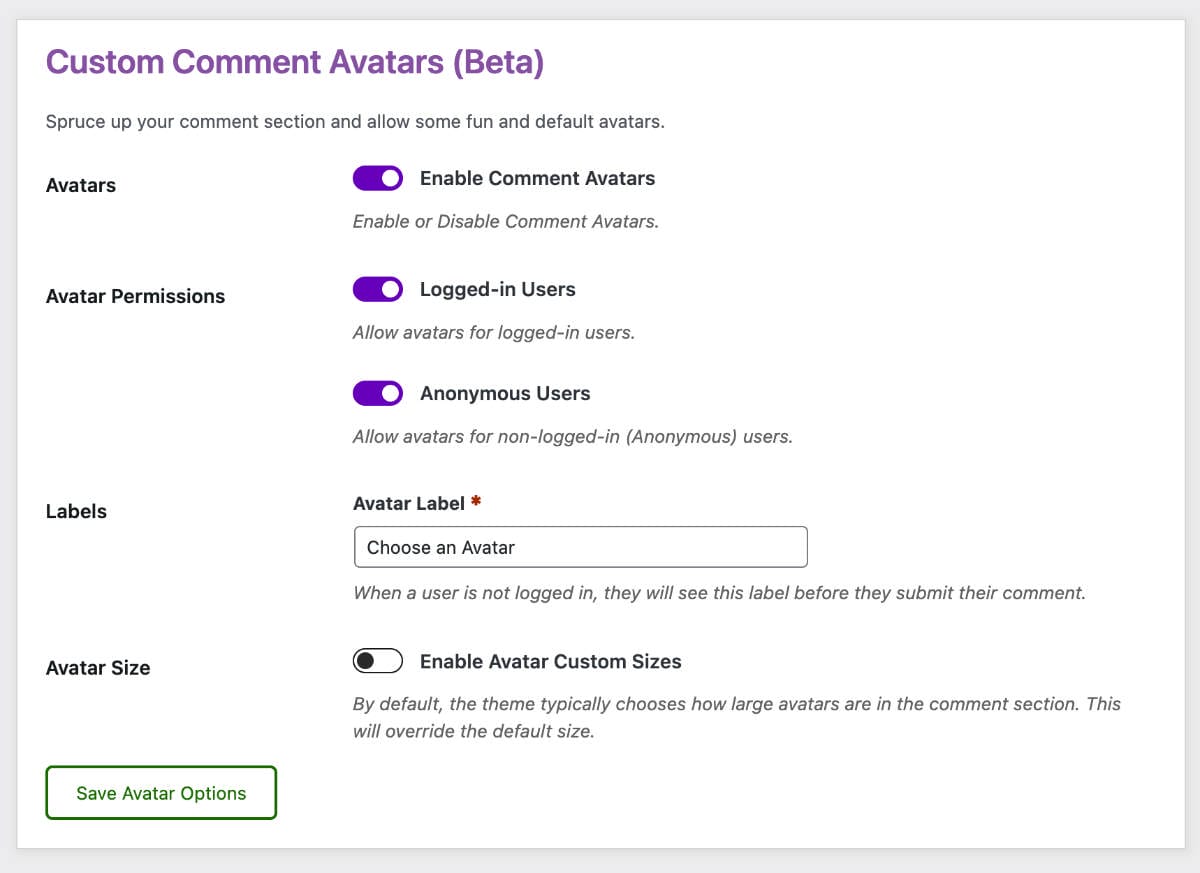
With the admin redesign mostly set, I decided to code and release Comment Avatars.
Feature Brainstorming
In addition to Avatars, I had the following ideas for adding value to the comment section:
- Akismet Options
- reCAPTCHA support
- Mailchimp support
- Trusted comments
- Gravatar protection
- Custom Avatars
- Extend timer
- Allow alerts in the editing interface
- Allow alerts right above the comment form
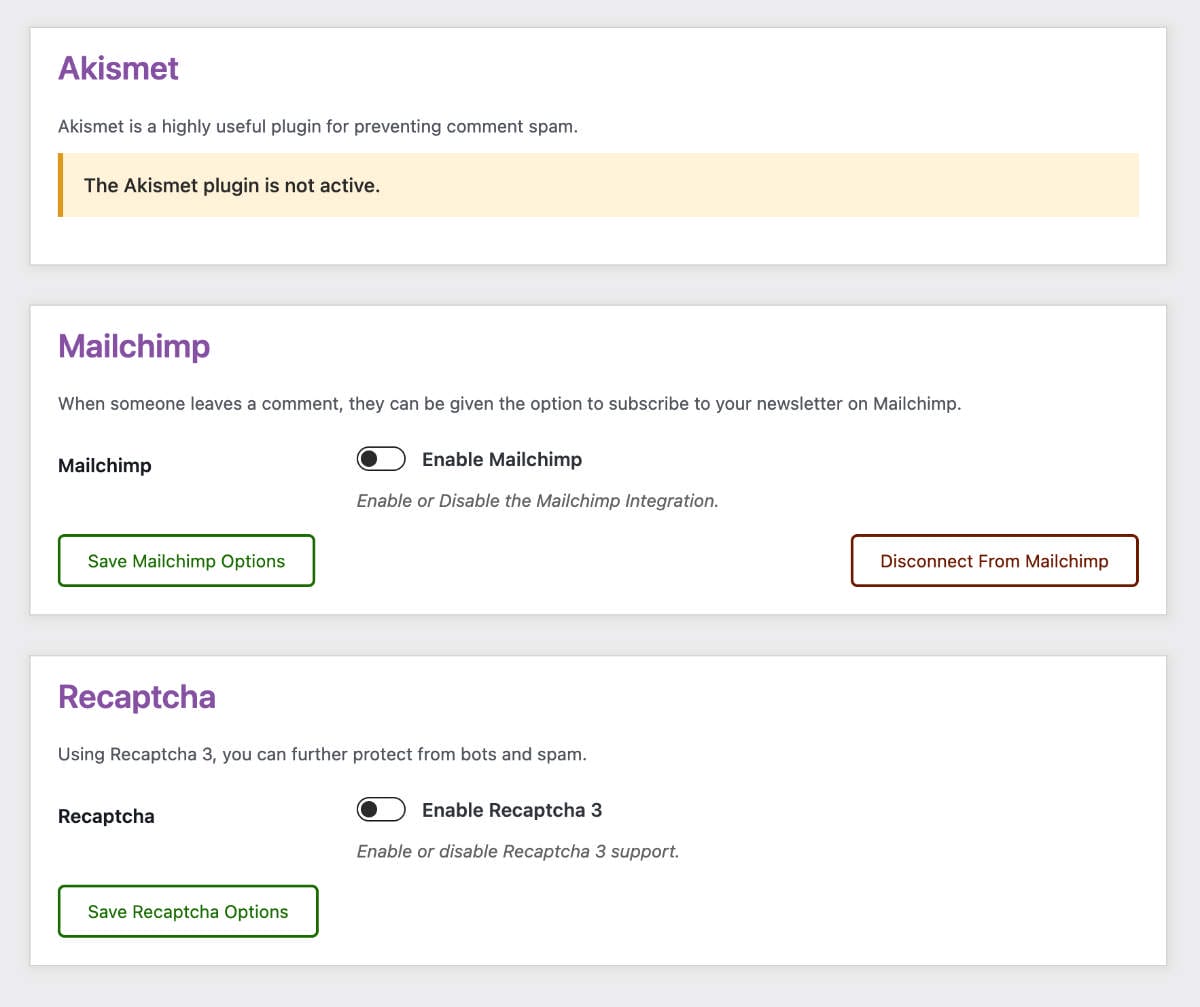
I ultimately decided to work on Akismet, reCAPTCHA, and Mailchimp.
Integrating Akismet and Mailchimp was pretty simple.
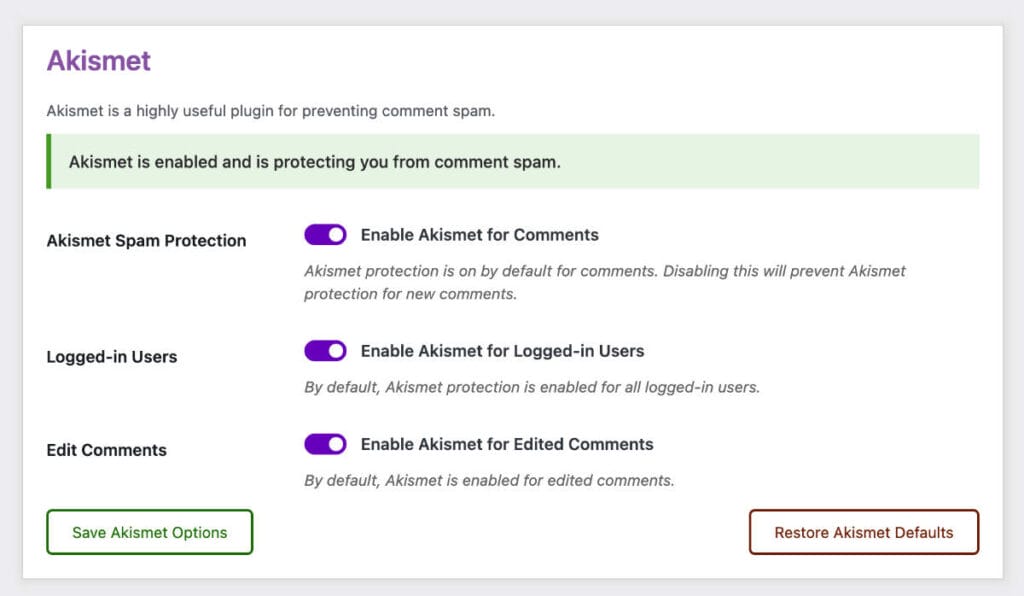
Akismet Spam Protection
With Akismet, I wanted to provide a way to disable the comment spam feature for just comments, and also an option to exclude logged-in users from the spam protection.
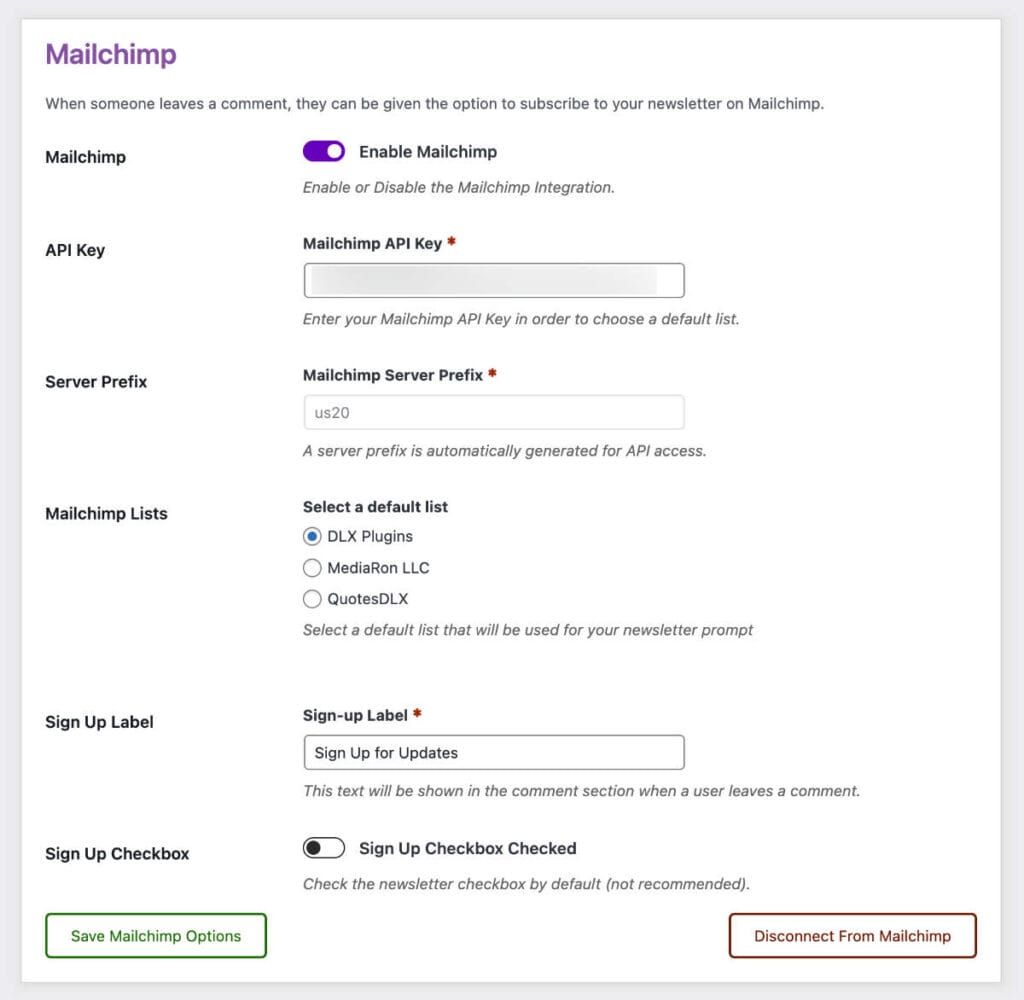
Mailchimp
Mailchimp was a bit harder, but it wasn’t that demanding of a feature. Integrating with their API was fairly easy.
reCAPTCHA 3 Support
I saved reCAPTCHA for last. I figured it would be the easiest of all three new features. I was wrong.
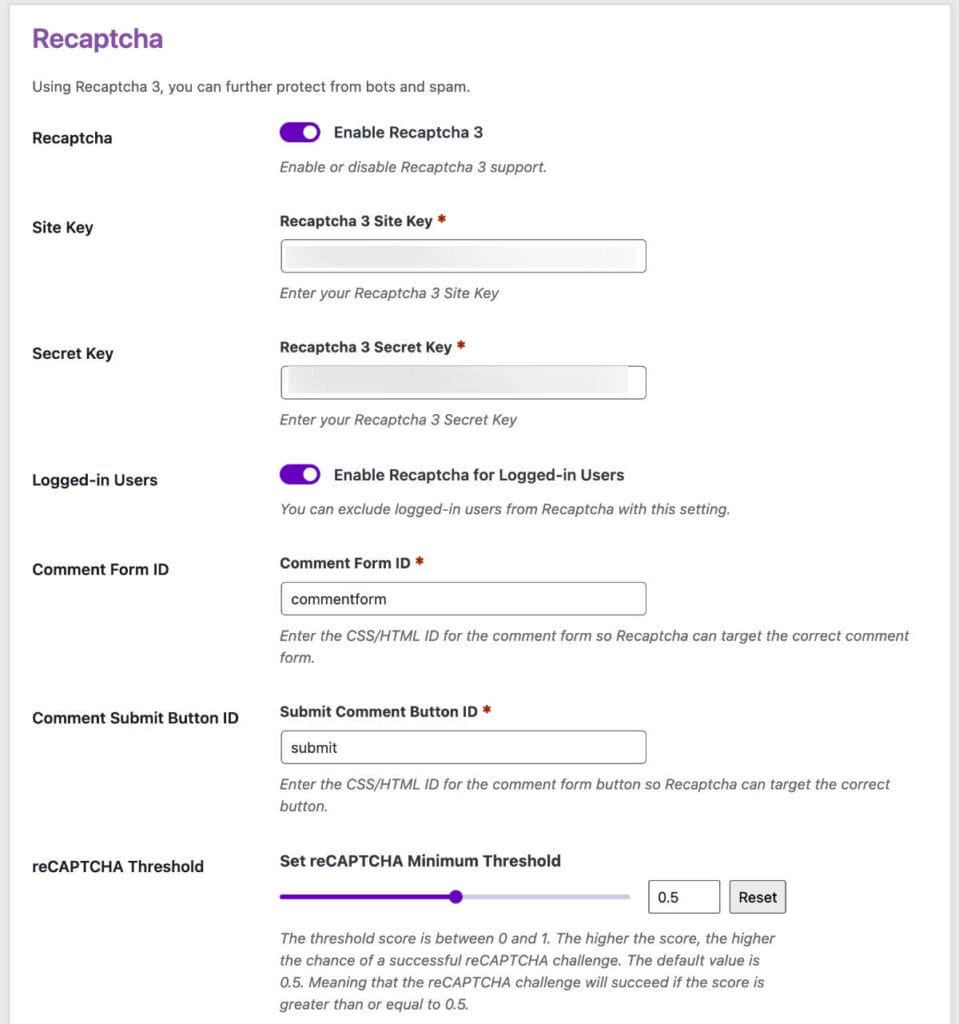
I wanted to support reCAPTCHA 3. But it took quite a bit to code/configure. Here’s all the options I ended up with.
reCAPTCHA 3 and the Comment Form: a royal PITA
The reCAPTCHA 3 docs made the implementation seem simple.
- Enqueue the reCAPTCHA 3 script
- Add some classes and data attributes to the comment submit button
- Add a callback function to handle the token reCAPTCHA provided
I wish it were that easy.
reCAPTCHA Site and Secret Key Options
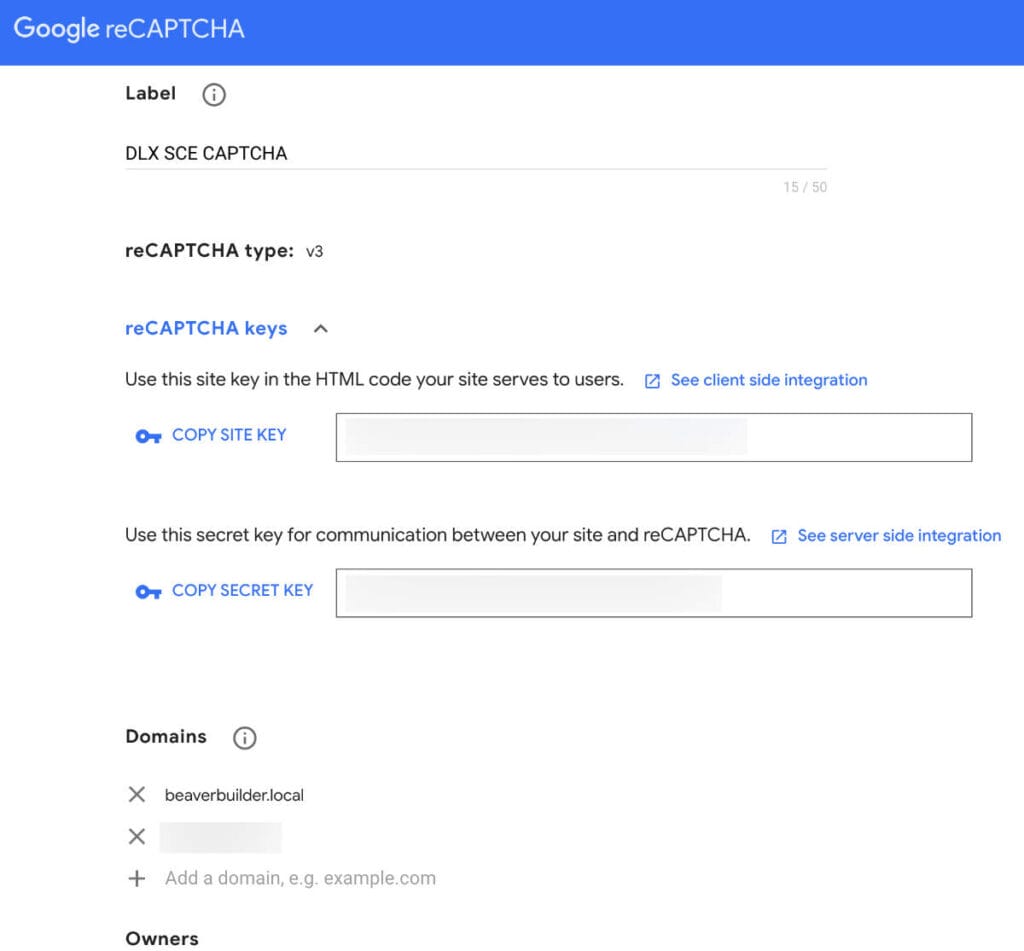
The first step to getting reCAPTCHA 3 to work is registering your Site and Secret keys.
I was using these keys for testing my integration. You can add a local environment as long as it is https and mapped to a local domain.
Armed with a Site Key and Secret key, now it’s time to load in the reCAPTCHA API script.
Enqueue the reCAPTCHA 3 Script
Next up is enqueueing the reCAPTCHA 3 API script.
For this example, I’m appending the Site Key to the reCAPTCHA endpoint.
/**
 * Load recaptcha if enabled and comments are open.
 */
public function enqueue_recaptcha_scripts() {
	$options = Options::get_options();

	if ( (bool) $options['recaptcha_enabled'] ) {
		wp_enqueue_script(
			'sce-recaptcha',
			esc_url_raw( 'https://www.google.com/recaptcha/api.js?render=' . sanitize_text_field( $options['recaptcha_site_key'] ) ),
			array(),
			Functions::get_plugin_version(),
			true
		);
	}
}
Code language: PHP (php)
The endpoint is actually just: https://www.google.com/recaptcha/api.js
I added the render query with the Site Key in order to use reCAPTCHA helper functions (more on that in a bit).
For good measure, I added defer to the reCAPTCHA script (using my class structure).
/**
 * Defer the recaptcha scripts.
 *
 * @param string $tag    The script tag.
 * @param string $handle The script handle.
 * @param string $src    The script source.
 *
 * @return string The script tag.
 */
public function defer_scripts( $tag, $handle, $src ) {
	$scripts_to_defer = array(
		'sce-recaptcha',
	);
	if ( in_array( $handle, $scripts_to_defer, true ) ) {
		return str_replace( ' src', ' defer="defer" src', $tag );
	}
	return $tag;
}
add_filter( 'script_loader_tag', array( $this, 'defer_scripts' ), 10, 3 );
Code language: PHP (php)
Modify the Comment Submit Button
According to Google’s docs, the next step is to modify the submit button to match the following:
<button class="g-recaptcha"
        data-sitekey="reCAPTCHA_site_key"
        data-callback='onSubmit'
        data-action='submit'>Submit</button>Code language: HTML, XML (xml)
This would require that I either modify the submit button programmatically, or via JavaScript, or both.
So I tried using their example of setting the attributes and having reCAPTCHA 3 automatically work. Missing from their example, however, is that you must verify the token (typically on the backend).
Setting the attributes didn’t work. Like, at all.
To get the submit button work, I had to go two routes:
/**
 * Add Google Recaptcha to the comment submit button.
 *
 * @param array $args Comment defaults.
 */
public function add_recaptcha_css_class( $args ) {
	$args['class_submit'] .= ' g-recaptcha';
	$args['name_submit']   = 'sce-recaptcha-submit';
	$args['id_submit']     = 'sce-recaptcha-submit';

	return $args;
}
add_filter( 'comment_form_defaults', array( $this, 'add_recaptcha_css_class' ), 10, 1 );Code language: PHP (php)
One of the requirements was adding the g-recaptcha class to the submit button. I did this by modifying the output of the comment_form_defaults, which is called in the comment_form function.
However, with my tests, the submit button didn’t even trigger, much less reach the backend. Also, the id_submit arg didn’t change the ID of the button.
After going back and forth, I finally came across the answer buried in this Stackoverflow section.
In the filter call above, I “attempted” to change the button ID. It didn’t work.
$args['id_submit'] = 'sce-recaptcha-submit';Code language: PHP (php)This brought me down another rabbit hole: the comment_form_submit_button filter.
/**
 * Modify the comment submit button.
 *
 * @param string $submit_button The comment submit button.
 * @param array  $args          The comment form arguments.
 *
 * @return string The modified comment submit button.
 */
public function modify_comment_submit_button( $submit_button, $args ) {
	$options                    = Options::get_options();
	$recaptcha_site_key         = $options['recaptcha_site_key'];
	$recaptcha_submit_button_id = $options['recaptcha_comment_submit_button_id'];

	if ( ! empty( $recaptcha_site_key ) && $options['recaptcha_enabled'] ) {
		$submit_button = str_replace( 'type="submit"', 'type="button"', $submit_button );
		$submit_button = str_replace( 'id="' . esc_attr( $recaptcha_submit_button_id ) . '"', 'id="sce-recaptcha-submit"', $submit_button );
		return $submit_button;
	}
	return $submit_button;
}
add_filter( 'comment_form_submit_button', array( $this, 'modify_comment_submit_button' ), 10, 2 );
Code language: PHP (php)
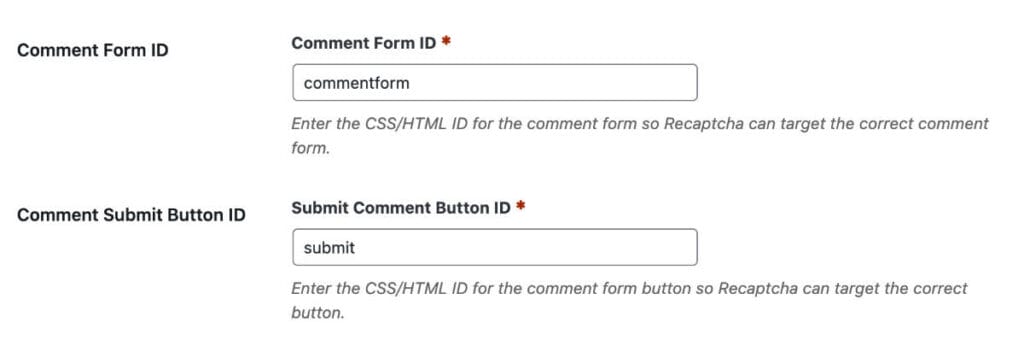
In order to take over the submit button, I had to be able to “find” the button.
As a result, I added a few additional options for a user to specifically target the correct comment form and button.
I set what are typically defaults for both options: commentform and submit.
Armed with a Comment Button ID, I can then replace the submit button’s ID attribute.
$submit_button = str_replace( 'id="' . esc_attr( $recaptcha_submit_button_id ) . '"', 'id="sce-recaptcha-submit"', $submit_button );Code language: PHP (php)Now my submit button HTML is:
<input name="sce-recaptcha-submit" type="button" id="sce-recaptcha-submit" class="submit g-recaptcha" value="Post Comment">Code language: HTML, XML (xml)I changed the button from type submit, and also replaced the name and ID attributes. I basically got rid of most things that said submit. This is so I can submit the form after receiving the reCAPTCHA token.
The reCAPTCHA Callback
Finishing up the front-end, I needed to hook into the comment submit button. But I also needed a callback that would allow reCAPTCHA to work so I could get its token.
/**
 * Print recaptcha scripts to the front-end.
 */
public function print_recaptcha_scripts() {
	$options                            = Options::get_options();
	$comment_form_id                    = $options['recaptcha_comment_form_id'];
	$recaptcha_comment_submit_button_id = $options['recaptcha_comment_submit_button_id'];
	if ( (bool) $options['recaptcha_enabled'] && $comment_form_id ) {
		?>
		<script>
			var sceCommentSubmitButton = document.getElementById( '<?php echo esc_js( 'sce-recaptcha-submit' ); ?>' );
			if ( null !== sceCommentSubmitButton ) {
				sceCommentSubmitButton.addEventListener( 'click', function( event ) {
					sceCommentSubmit( event );
				} );
		}
		function sceCommentSubmit( e ) {
			e.preventDefault();
			grecaptcha.ready(function() {
			grecaptcha.execute('<?php echo esc_js( $options['recaptcha_site_key'] ); ?>', {action: 'submit'}).then(function(token) {
				let recaptchaForm = document.getElementById('<?php echo esc_js( $comment_form_id ); ?>');
				if ( null !== recaptchaForm ) {
					var recaptchaInput = document.createElement('input');
					recaptchaInput.setAttribute('type', 'hidden');
					recaptchaInput.setAttribute('name', 'g-recaptcha-response');
					recaptchaInput.setAttribute('value', token);
					recaptchaForm.appendChild(recaptchaInput);
					recaptchaForm.submit();
				}
			});
			});
		};
		</script>
		<?php
	}
}
add_action( 'wp_print_footer_scripts', array( $this, 'print_recaptcha_scripts' ) );Code language: PHP (php)
When the comment submit button is clicked, I use JavaScript callback sceCommentSubmit to add the necessary attributes in the HTML itself and then force-submit the form.
The value of the hidden input is the token reCAPTCHA gives you. When submitting the form, we can finally get the token in the back-end and verify the token.
Verifying the reCAPTCHA 3 Token
The verifying part of the reCAPTCHA is pretty well done. I just passed in a few variables to an endpoint and received a “score” of the submission.
Knowing this, I added another option: for a user to be able to set up the score threshold. With 1 being the best score, and 0 being the worst score, I decided to use an intelligent default of 0.5 (per Google’s recommendation).
If anything fails as far as reCAPTCHA, I use WordPress function wp_die to display an error to the user (or bot). Here is the back-end code for verifying the reCAPTCHA on comment submission.
/**
 * Verify the recaptcha response.
 *
 * @param int $comment_id The comment ID to check.
 */
public function verify_recaptcha( $comment_id ) {
	$options = Options::get_options();
	if ( ! $options['recaptcha_enabled'] ) {
		return;
	}
	$token = sanitize_text_field( filter_input( INPUT_POST, 'g-recaptcha-response', FILTER_DEFAULT ) );
	if ( ! $token ) {
		wp_die( esc_html__( 'Could not verify reCAPTCHA.', 'comment-edit-pro' ) );
	}
	$secret_key = $options['recaptcha_secret_key'];
	$url        = 'https://www.google.com/recaptcha/api/siteverify';
	$data       = array(
		'secret'   => $secret_key,
		'response' => $token,
	);
	$args       = array(
		'body'      => $data,
		'method'    => 'POST',
		'sslverify' => true,
	);
	$response   = wp_remote_post( esc_url( $url ), $args );
	if ( is_wp_error( $response ) ) {
		wp_die( esc_html__( 'reCAPTCHA could not be verified.', 'comment-edit-pro' ) );
	}
	$body = json_decode( wp_remote_retrieve_body( $response ), true );
	if ( ! $body['success'] ) {
		wp_die( esc_html__( 'reCAPTCHA security challenge has failed.', 'comment-edit-pro' ) );
	}

	// all is well. Check the threshold.
	$score_threshold         = (float) $options['recaptcha_score_threshold'];
	$comment_recaptcha_score = (float) $body['score'];
	if ( $comment_recaptcha_score < $score_threshold ) {
		wp_die( esc_html__( 'reCAPTCHA security challenge has failed.', 'comment-edit-pro' ) );
	}

	// Now silently exit as all is well now.
}
add_action( 'pre_comment_on_post', array( $this, 'verify_recaptcha' ), 10, 1 );Code language: PHP (php)
reCAPTCHA Conclusion
I suppose in all of this, I wanted to show how unnecessarily complex it is to set up reCAPTCHA 3 on the comment form.
I’m still in the middle of testing, but the reCAPTCHA features I mentioned here will be apart of Comment Edit Pro when complete.

